
In this introductory project, you'll make a picture or animation appear on the micro:bit display when you press the micro:bit's A or B buttons, or when the micro:bit is tilted.
This activity is suitable for those who have never programmed before or those seeking an introduction to the BBC micro:bit. It uses MicroBlocks, a Scratch-like programming system that lets you try out blocks or test your code instantly, right on your micro:bit!
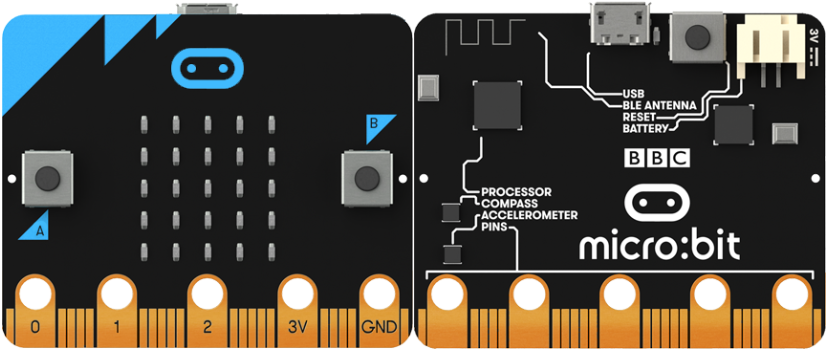
You need a BBC micro:bit:
You also need a computer with a USB port, a USB cable to connect the micro:bit to your computer, and the (free!) MicroBlocks software.
Download the MicroBlocks software for your computer (Windows, MacOS, Linux, or ChromeBook), then follow these setup instructions or this two-minute video:
If you normally use MakeCode or other system to program the micro:bit, don't worry. Installing MicroBlocks isn't permanent, and you can go back to MakeCode whenever you wish.
Make sure your micro:bit is connected to your computer. Start MicroBlocks, then click the  button and select the USB port for your micro:bit. (It's usually the only one listed in the menu.)
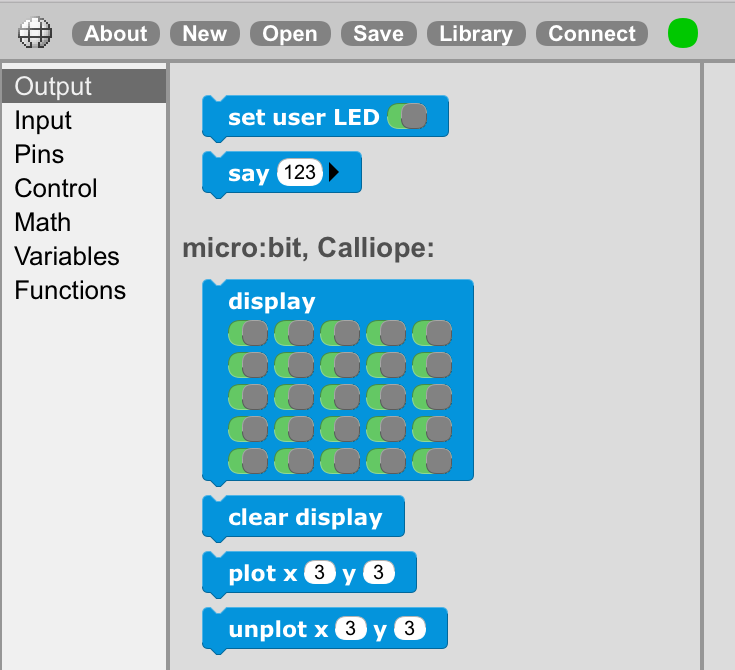
Make sure that the "Output" category is selected:
MicroBlocks lets you test blocks and scripts just by clicking on them. You see the results immediately right on your micro:bit; you don't need to wait for your code to be compiled and downloaded. You can use this feature to test scripts as you work, or simply click a block to see what it does.
Click the display block:
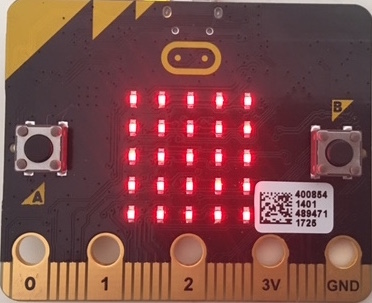
All the LEDs on your micro:bit's 5x5 LED display will light up:

To control your micro:bit, you'll drag blocks from the blocks palette into the large gray scripting area to the right of the palette and assemble them into scripts.
Drag the "display" block from the palette into the scripting area:
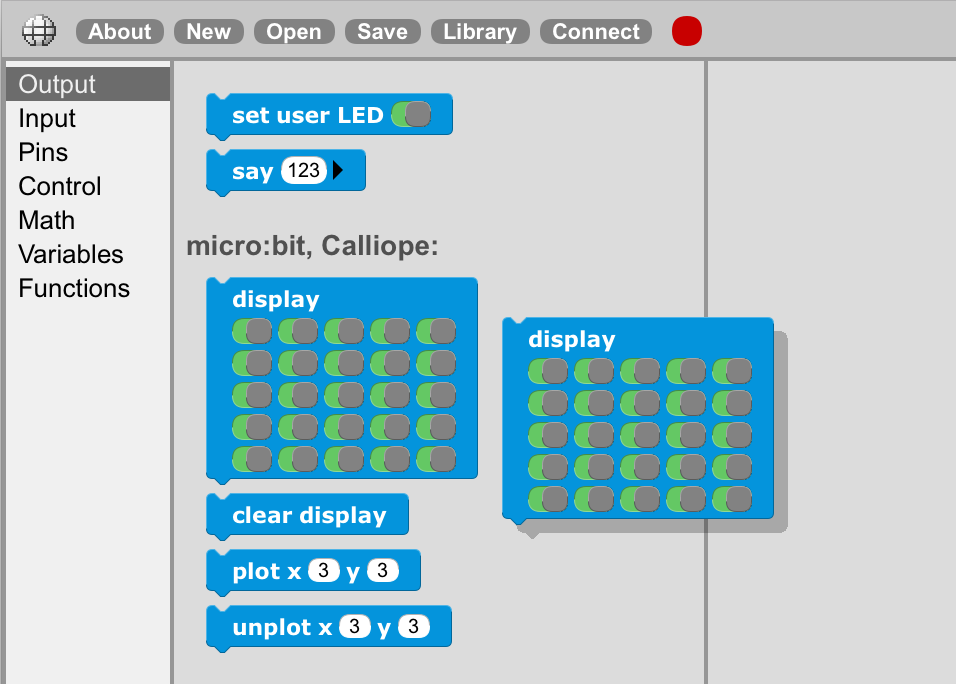
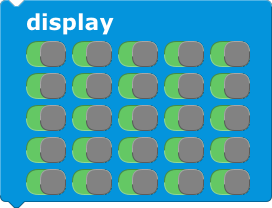
Many blocks can be customized by changing parameters to get the exact effect you want. For example, the "display" block has 25 little switch parameters:

Clicking these switches toggles them between off (red) and on (green). Each of these switches corresponds to one of the LEDs on the micro:bit's LED display. You can create a little picture by editing the switches on the display block:
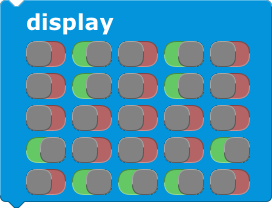
When you click this block, the picture will appear on the micro:bit:

To create an animation, you'll write a script to display a sequence of images on the micro:bit display.
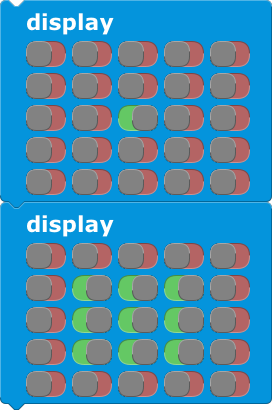
Drag two "display" blocks out of the palette and create two different pictures such as:
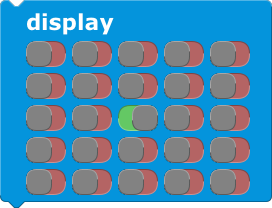
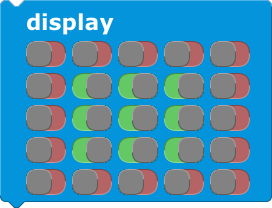
If you quickly click first one block then the other, you'll get a sense of animation. Let's make a script that does this. Drag one "display" block under the other until a white line appears, then drop the block:
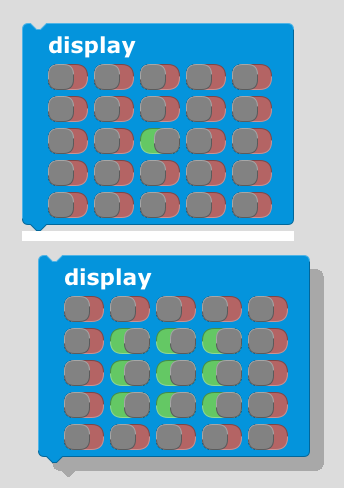
The two blocks will stick together:
In MicroBlocks, a group of blocks stuck together is called a script. You can run a script by clicking on it. Try it.
But wait -- you only see the second picture. That's not an animation!
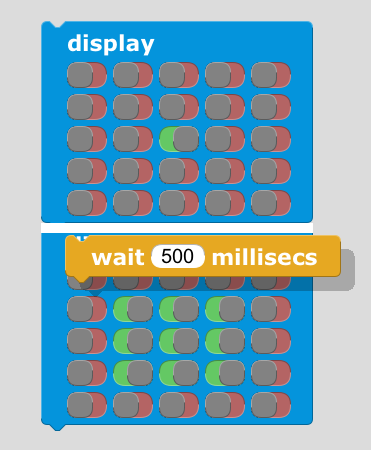
The problem is that the micro:bit is so fast that your eyes don't have time to see the first picture of the animation. You need to add a "wait millisecs" block to slow it down. You can find that block in the "Control" category. Drag it out and hold it over the boundary between your two "display" blocks. Its left edge must be close to the left edge of the two "display" blocks. A white line will appear:
Drop the block. It will get inserted between the two "display" blocks:
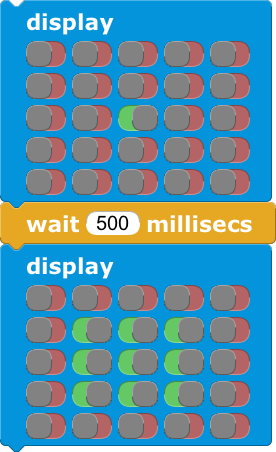
Click this script to run it. Now you'll see the animation.
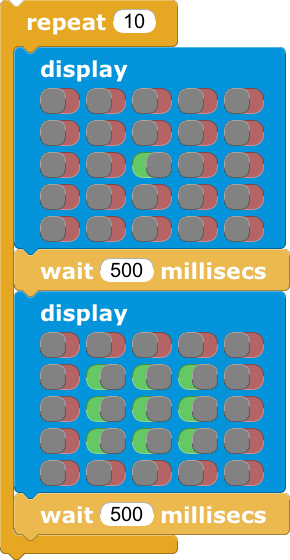
You can take this one step further by making the animation repeat. Drag a "repeat" block out of the "Control" category of the palette. Then drag your three block script into the "jaws" of that block:
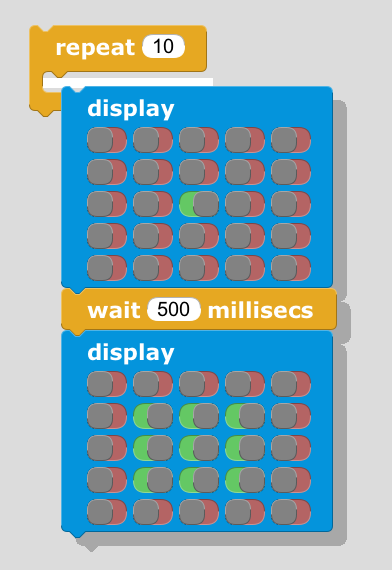
Finally, add one more "wait millisecs" block:
Try it! You can speed up the animation by changing the amount of time it waits after each frame. Click in the white oval in each "wait millisecs" block and change the "500" to "100":

Experiment with other numbers to find a speed you like.
Hint: You can change parameters even while your script is running. This allows you to see the effect of your change right away.
Of course, you can also change the number of times the animation repeats.
To make a script that does something when the micro:bit's A button is pressed, drag out a "when button A pressed" hat block from the "Control" category:

Attach a display block under the hat block:
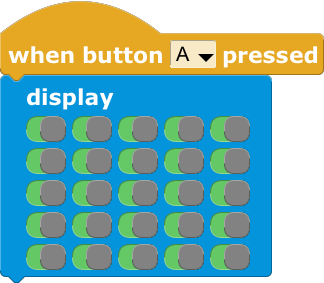
Make your own picture on this display block, then click the A button on the micro:bit. Your picture appears!
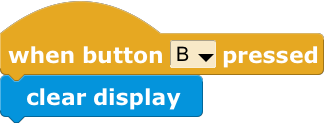
Once the picture appears, it just stays on the display. Let's add a second script to make it disappear when the B button is pressed.
Drag out a "when button A pressed" hat block, then click on the little triangle to the right of "A" and select "B" from the menu. FInally, attach a "clear display" block.
Test your code by pressing the A and B buttons to make your picture appear and disappear.
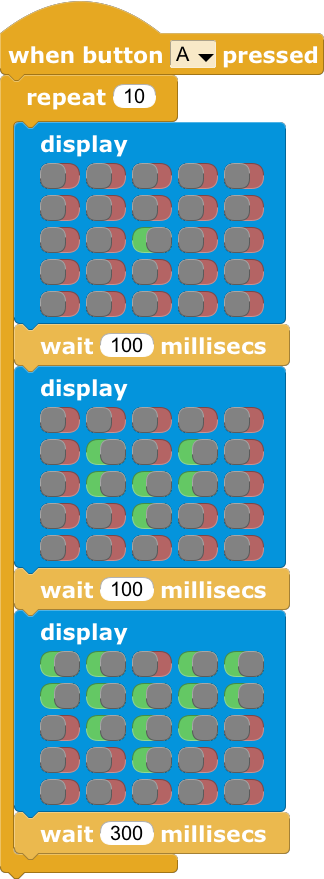
Make the A button trigger an animation by attaching the blocks for the animation to a "when button A pressed" hat block:
Add a "clear display" block to make the animation turn off the LED display when it is finished:
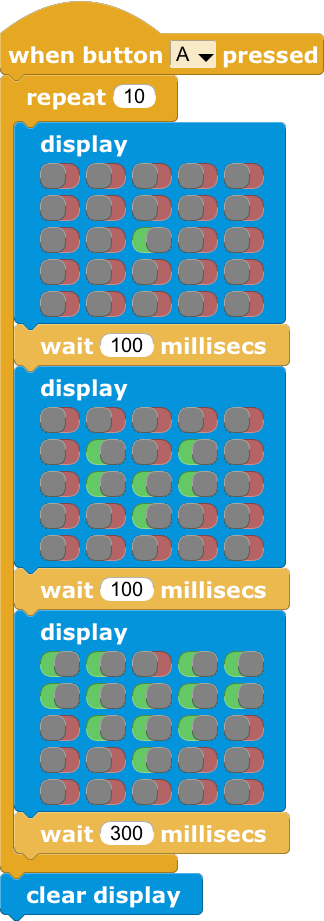
Make sure you put the "clear display" block at the very bottom, after the "repeat" block. Since the A button animation now turns off the display when it's finished, you can use the B button for a different picture or animation.
It's amazing what you can do with just 25 little red LED's. Make your own pictures and animations. Display your initials or spell out a message. Make a picture appear to scroll across the screen. Change the numbers in the "wait" blocks to make animations go faster or slower.
If you have a battery for your micro:bit, you can unplug your micro:bit from your computer and plug in the battery:
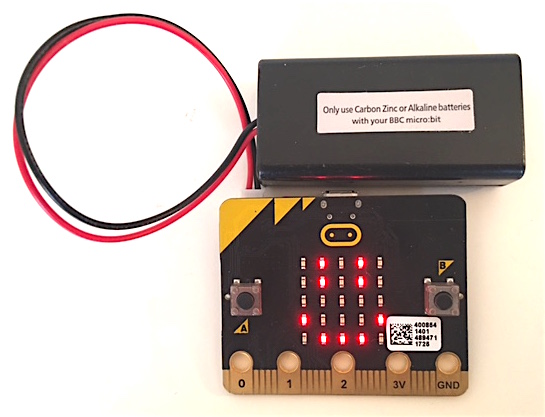
Now you can take your micro:bit with you. Show your animations to friends or even attach the micro:bit to your clothing to light up the world with your animations.
You can use the micro:bit tilt sensor to display pictures or animations when you tilt the micro:bit. Start with a "when" hat block, then add a ">" block (from the "Math" category) and a "tilt x" block (from "Input"):
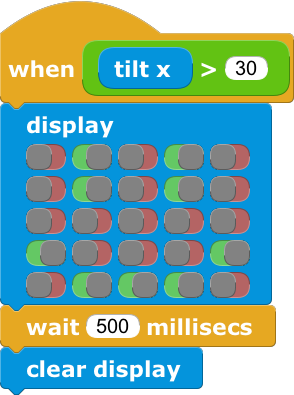
Which way do you need to tilt the micro:bit to make the picture appear? How would you change the script to make a picture appear when you tilt the micro:bit in the other direction?
To make your a text message scroll across the micro:bit display, first click the  button and select the "text scrolling" library:
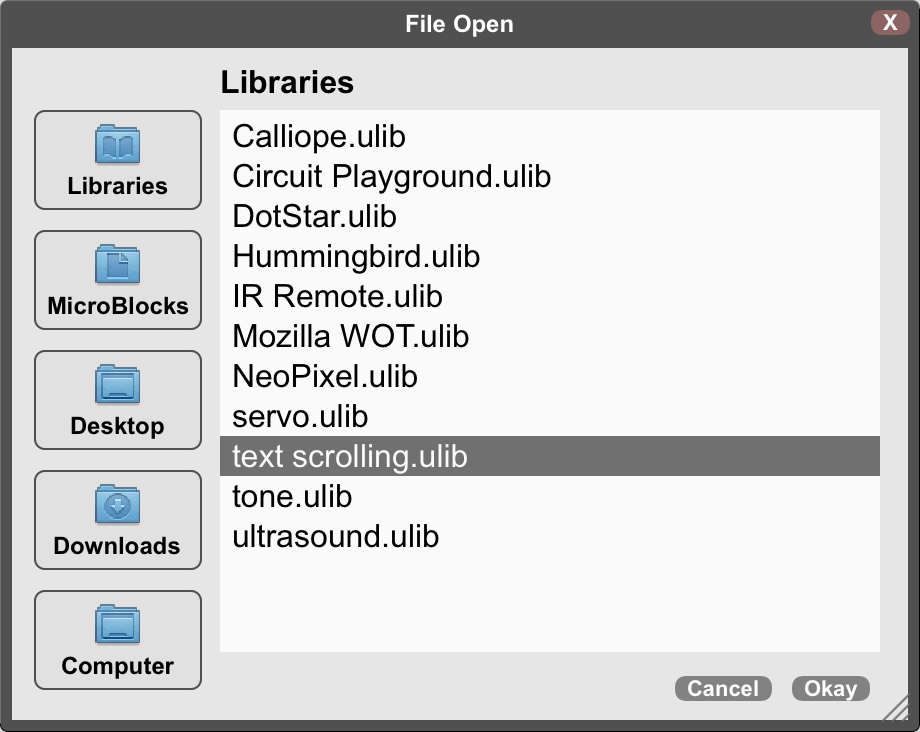
Click "Okay", then select the "Functions" category to see the newly added text scrolling blocks:
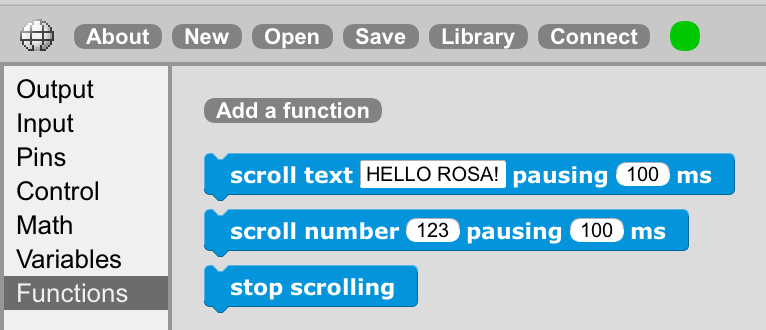
Drag a "scroll text" block into the scripting area and edit the text to add your own message:

Then click the block to see your message scroll across the micro:bit display.
If you enjoyed this activity, you might be interested in this follow-on MicroBlocks Hour of Code activity:
There is much more you can do with MicroBlocks. In addition to the BBC micro:bit, MicroBlocks runs on other microcontrollers such as the AdaFruit Circuit Playground Express, many 32-bit Arduinos, and WiFi-enabled boards based on ESP8266 and ESP32 modules. You can connect cool things to your BBC micro:bit, such as a piezo speaker (to make music), NeoPixels (to make things light up), sensors (to sense the world), and motors (to make things move). You can even interface with the Mozilla IoT Gateway to make MicroBlocks creations you can control from anywhere on the internet!
To learn more, check out the MicroBlocks Website
Welcome to the MicroBlocks community!