
In this project, you'll create a game for the BBC micro:bit. Using the buttons, the player will move a shield to catch falling meteors and save the Earth.
The techniques you learn in this project can be used to make many other games for the BBC micro:bit, including classics such as Pong and Space Invaders.
Those familiar with a blocks language like Scratch, and who have used "forever" loops, "if" blocks, and variables will feel comfortable doing this project.
Those who have never programmed are encouraged to try this project, too. It's fun, and the step-by-step instructions explain how the code works as you go.
Experienced coders can skip ahead and build the scripts shown in the "All the Scripts" section to get their game up and running as quickly as possible. They can then explore the "remix" suggestions or think up their own refinements.
You need a BBC micro:bit:
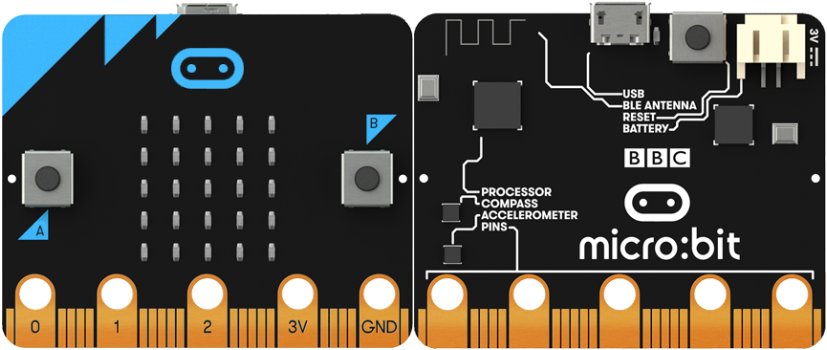
You also need a computer with a USB port, a USB cable to connect the micro:bit to your computer, and the (free!) MicroBlocks software.
Download the MicroBlocks software for your computer (Windows, MacOS, Linux, or ChromeBook), then follow these setup instructions or this two-minute video:
If you normally use MakeCode or other system to program the micro:bit, don't worry. Installing MicroBlocks isn't permanent and you can go back to MakeCode whenever you wish.
In this game, the player will use the A and B buttons to move a shield back and forth to protect the Earth from falling meteors. The shield will be one lit LED in the 5 x 5 LED display. The shield will always be in the bottom row, but we need to keep track of how far left or right it is. The LEDs are numbered from 1 to 5 from left to right. We'll use a variable to keep track of where the shield is.


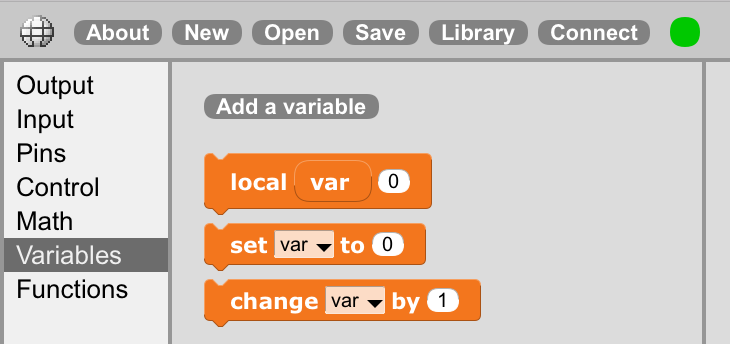
To create a variable, click on the "Variables" category on the left side of the MicroBlocks screen and then click on the "Add a variable" button:
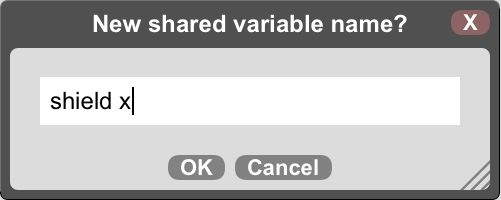
MicroBlocks will ask for the name of the variable. Enter "shield x" and click the "OK" button:
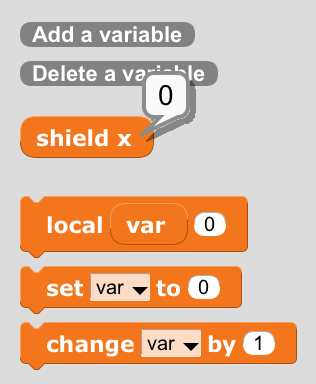
A new "shield x" block will appear the "Variables" category. You'll use that block in your program to say how far left or right the shield is. Click on that block to see it's current value:

Now, add a script to make the shield appear on the LED display. Drag out and assemble blocks into a script like this:
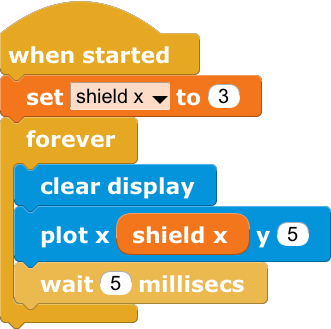
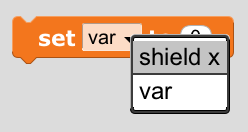
You'll need to look in several categories to find all the blocks you need. The yellow blocks are in the "Control" category, the blue blocks used in this script are in "Output", and the orange ones are in "Variables". To complete the script, you'll need to use the menu in the "set var to" block to select "shield x":
You'll also also need to click in some of the white parameter slots to enter the correct values:

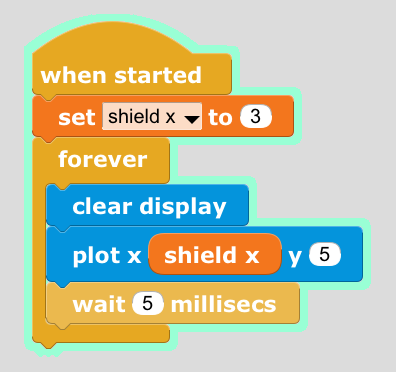
When your script looks right, click the  button. A glowing outline will appear around your script to show that it's running:
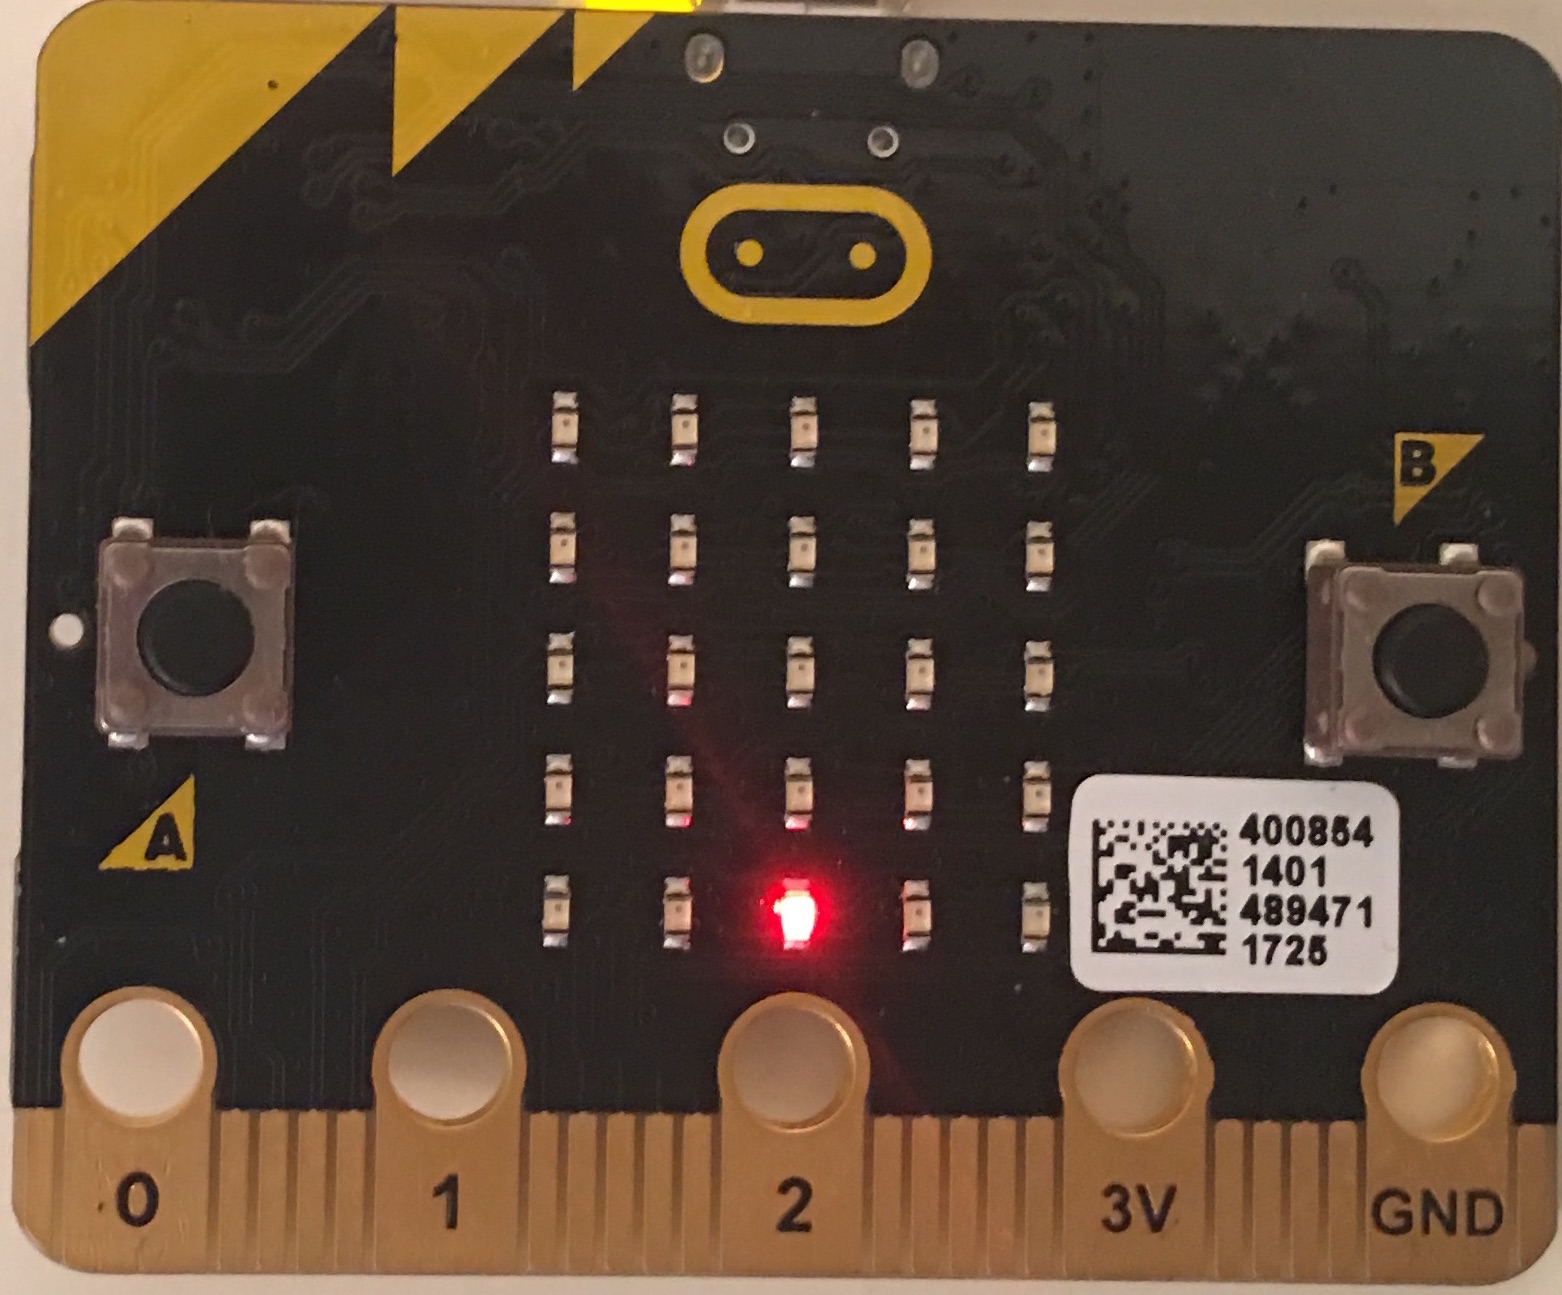
One LED in the middle of the bottom row will light up:
Drag out a "change var by 1" block from the "Variables" category, select "shield x" from the menu, and click on it:

If your display script is running, you'll see the lit LED move one LED to the right. You can use this idea to make a script that moves the shield to the right when the B button is pressed:
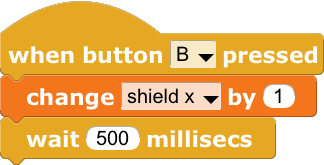
After you've built this script, click the button, then press the B (right) button on the micro:bit. The lit LED moves to the right. Yay!
But, wait -- after the lit LED has moved several steps to the right, it disappears! Looks like the program has a bug.
In this case, clicking on the "shield x" block provides a valuable clue:
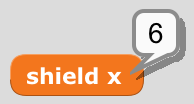
That number is greater than 5. Since the micro:bit LED array is only 5 LEDs wide, that means your shield has moved past the right edge of the display. To check this theory, set "shield x" to a number between 1 and 5:

The lit LED will reappear. Clicking the button will also make it reappear, because the first block of the display script sets "shield x" to 3. (Someone was thinking ahead when they included that block!)
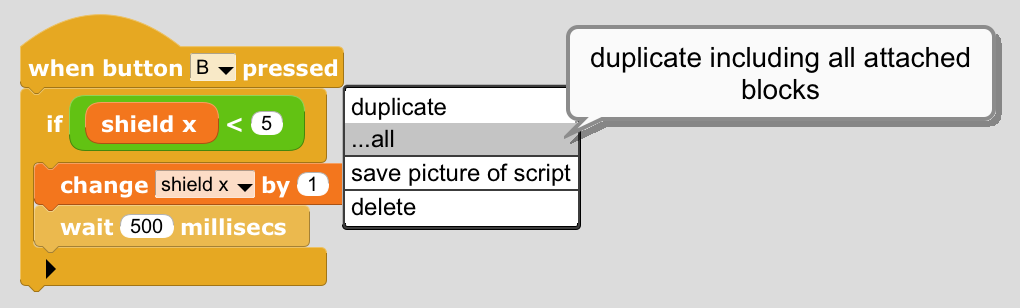
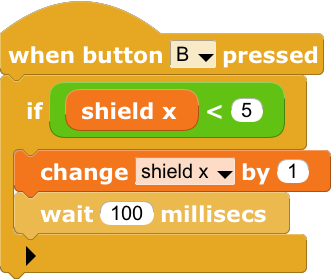
To fix this bug, use an "if" block so that the shield only moves to the right if that would not make it go off the right edge of the screen:

Now build a similar script to make the A (left) button move the shield to the left:

As a head start on building this script, you can duplicate the "button B" script. Right-click on the top block of "button B" script then select "...all" (short for "duplicate all") from the menu:
Note that the "button A" script is a sort of "mirror image" version of the "button B" script. It changes "shield x" by -1 and the "if" block makes sure that "shield x" is greater than one; that is, that the shield has room to move one step left without going off the edge of the screen.
Click the button and test moving the shield right and left. It should not disappear if you try to go past the edges.
So far so good. But the shield moves too slowly to catch a fast-falling meteor.
To speed things up, change the number in the "wait 500 milliseconds" blocks to something smaller, like 50 or 100. Notice that if you make that number too small, like "5", then the shield zips from one side to the other too fast, and it's difficult to stop it somewhere in the middle. Experiment to find a number that feels good to you.
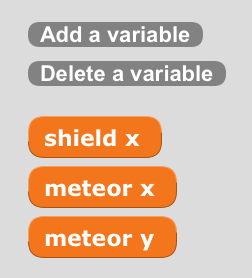
Let's add a meteor that starts at the top of the LED display and falls down. Like the shield, the meteor needs a variable to keep track of its left-to-right position. It also needs a variable to keep track of its top-to-bottom position. Use the "Add a variable" button to add two new variables, "meteor x" and "meteor y". You'll end up with three variables:
Now, add this script to make the meteor fall:
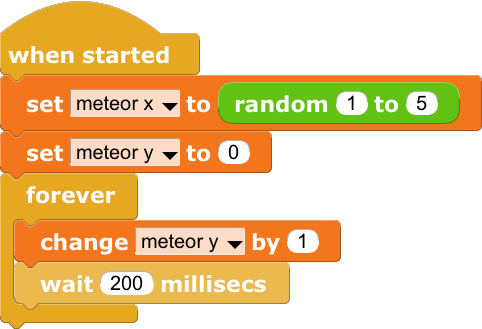
This script sets the meteor's left-right position to a random number between 1 (far left) and 5 (far right). The "meteor y" variable is set to 0 so that it starts just above the LED display. (LED display rows are numbered 1 to 5 from top to bottom.) The blocks in the "forever" loop increase "meteor y", making the meteor move down one row, then waits 200 milliseconds (that's 0.2 seconds) so it doesn't fall too fast. Changing that wait time will make the meteor fall slower or faster.
Now, add a block to the script that draws the shield to make it also draw the meteor:
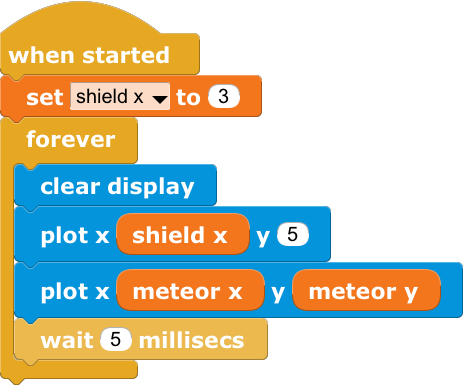
To test these changes, click the button a few times. You should see a meteor appear at a random place at the top of the LED display and move down until it disappears off the bottom.
But there's a problem. We don't want the game to be over after just one meteor. We want meteors to keep falling as long as the player is able to catch them. To fix this problem, we'll use an "if" block to detect when the meteor has fallen off the bottom and make it start from the top again:
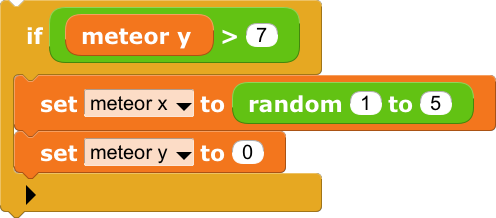
Insert this "if" block into the script that makes the meteor fall:
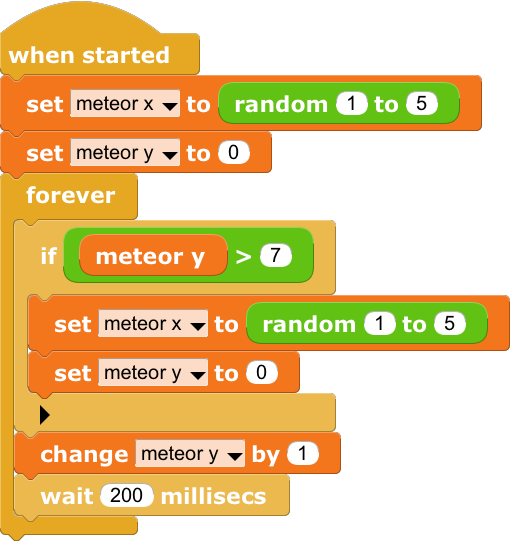
Click the to try this version.
The game now has a shield that be moved using the buttons and falling meteors, but nothing happens when the meteor hits the shield. It needs what game programmers call "collision detection".
How can we tell when the shield has blocked a meteor? Two things must be true. First, the meteor must have reached the bottom of the screen:

Second, the shield and the meteor must be at the same left-right position:

Those two checks can be combined using an "and" block:

The "and" block can be used in an "if" block to make something happen when a collision is detected, such as displaying a starburst:
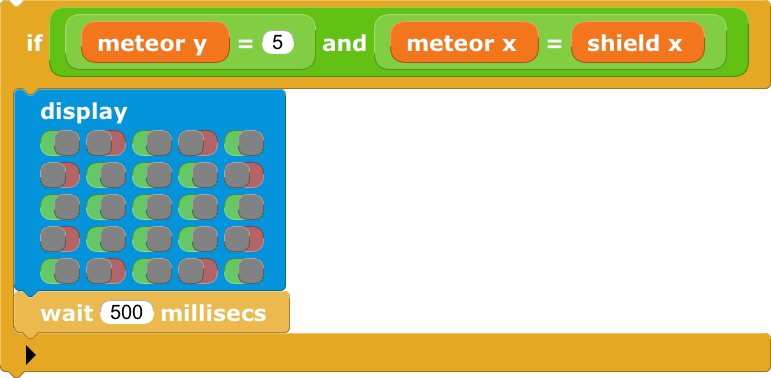
Add this "if" block to the drawing script:
Congratulations on completing the game. You're now an experienced micro:bit game programmer!
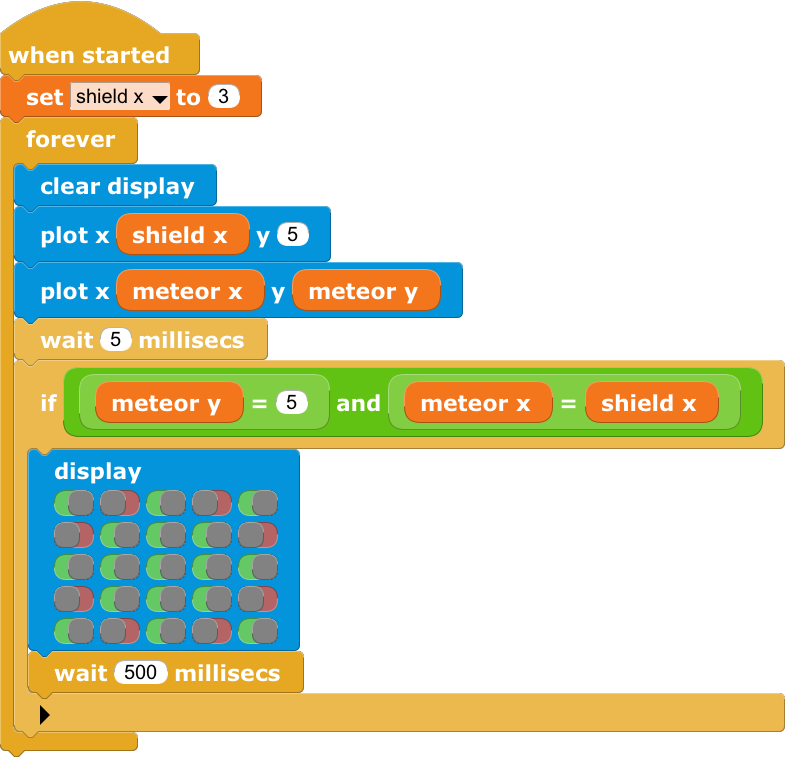
Here are all the scripts for the game:

Click the button and try the game. As you play, think about whether the game is too easy or too hard. Do meteors fall at the right speed to be challenging but not impossible to catch? Does the shield move at a good speed? If not, what changes might you make to get the feel you want?
You can disconnect your micro:bit from the computer, plug in a battery, and play this game anywhere.
Challenge yourself and your friends to see how many meteors you can catch!
Check out the "remix" ideas below for additional features you might add, or think up your own improvements. You can even use what you've learned to make micro:bit versions of other games, such as Pong or Space Invaders.
It would be great to make the game end when the player misses several meteors. Here's one way to do that.
Create a new variable named "misses" and add a block to the draw script to set "misses" to zero when the game starts.
Now add another "if" block to the draw script:
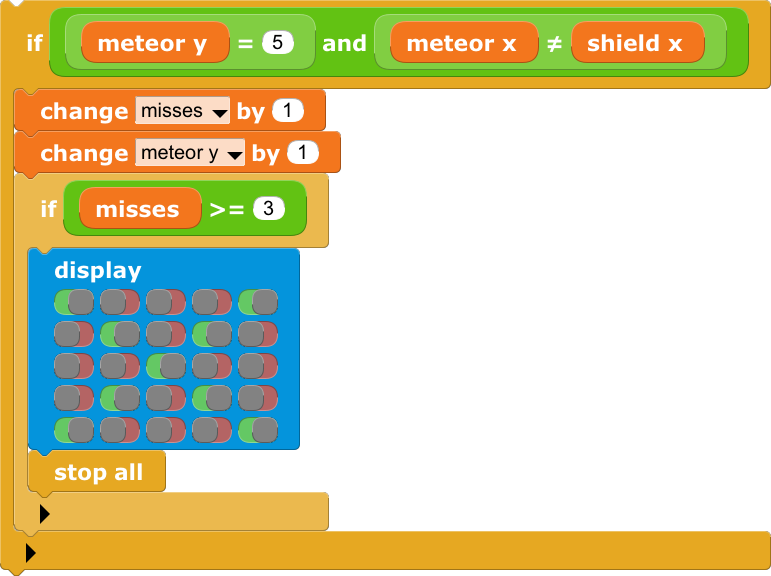
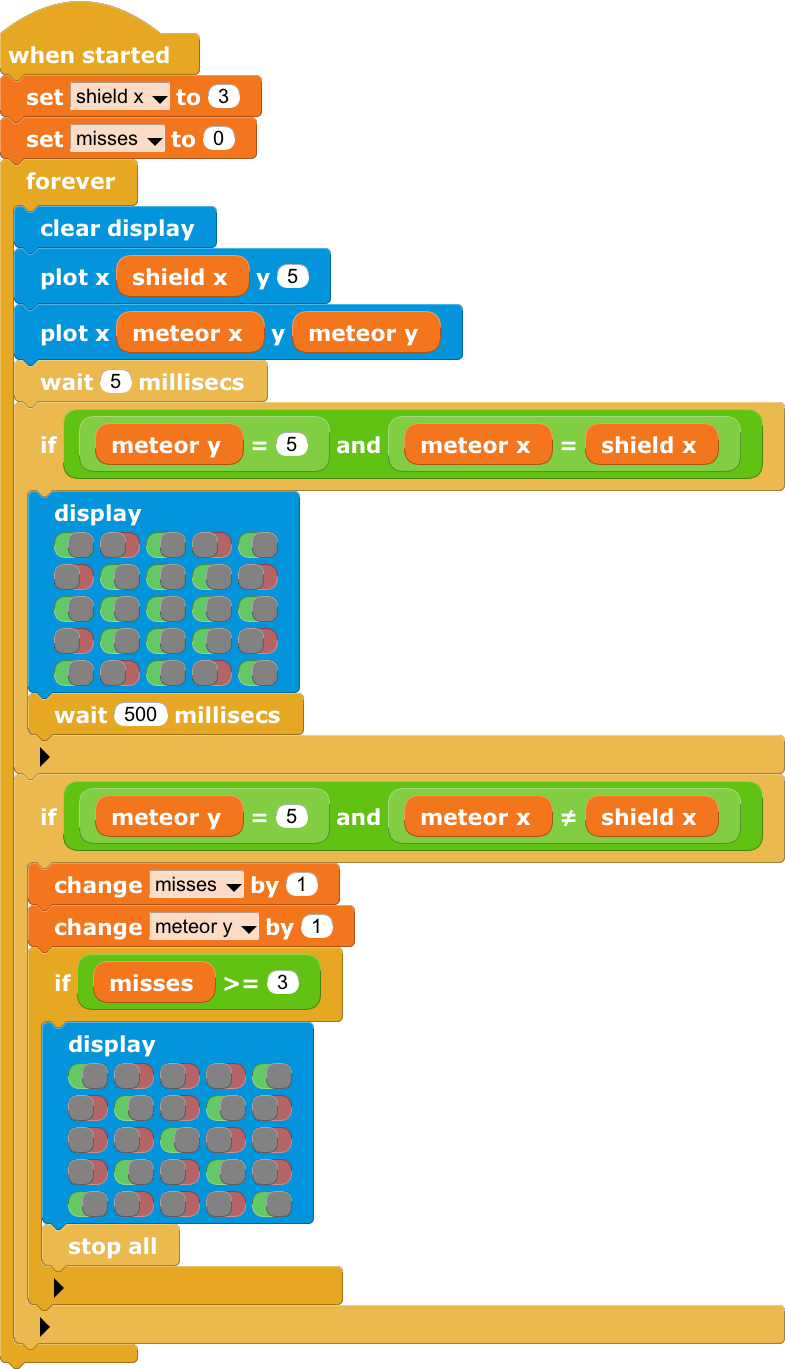
When the user misses a meteor, this code increases "misses" by one. It also increases "meteor y" by one -- that prevents this code from running more than once for each miss. Finally, if "misses" is more than three, it draws an "X" and stops the game. Here is the modified draw script:
How would you keep track of how many meteor's the player has caught? Yep, with another variable! Remember to set the score to zero at the start of the game. When the game ends, it might display a symbol based on the score to tell the player how well they did. For example, it might display a smiley face if the player scored over 10 points.
One way to make the game harder is to make meteors fall faster. Can you figure out which "wait milliseconds" block controls how fast the meteors fall? Try different numbers to see how fast you can make the meteors fall and still be able to catch them.
If you've added a "score" variable, maybe you could make the meteors fall faster as the player scores more points.
If you enjoyed this activity, you might be interested in this MicroBlocks Hour of Code activity:
There is much more you can do with MicroBlocks. In addition to the BBC micro:bit, MicroBlocks runs on other microcontrollers such as the AdaFruit Circuit Playground Express, many 32-bit Arduinos, and WiFi-enabled boards based on ESP8266 and ESP32 modules. You can connect cool things to your BBC micro:bit, such as a piezo speaker (to make music), NeoPixels (to make things light up), sensors (to sense the world), and motors (to make things move). You can even interface with the Mozilla IoT Gateway to make MicroBlocks creations you can control from anywhere on the internet!
To learn more, check out the MicroBlocks Website
Welcome to the MicroBlocks community!